

Transactions are the fundamental way to change data on the Aptos blockchain. Think of them like sending a package: you need to specify what you’re sending, who it’s going to, and then track it until delivery is confirmed. In blockchain terms, transactions allow you to transfer coins, call smart contract functions, and update on-chain state.
This tutorial will guide you through creating and submitting your first transaction on the Aptos blockchain. You’ll learn how to:
- Set up your development environment
- Create test accounts and fund them
- Build a transaction to transfer coins
- Simulate the transaction to estimate costs
- Sign and submit the transaction
- Verify the transaction was executed successfully
1. Setting Up Your Environment
Section titled “1. Setting Up Your Environment”Before we can create transactions, we need to set up our development environment with the necessary tools and SDKs.
-
Install the TypeScript SDK
Install the TypeScript SDK using your preferred package manager:
Terminal window npm install @aptos-labs/ts-sdkTerminal window yarn add @aptos-labs/ts-sdkTerminal window pnpm add @aptos-labs/ts-sdk -
Create a project directory
Create a new directory for your project:
Terminal window mkdir my-first-transactioncd my-first-transaction -
Create a new file
Create a new file named
transaction.ts:Terminal window touch transaction.tsTerminal window type nul > transaction.ts
Before we can create transactions, we need to set up our development environment with the necessary tools and SDKs.
-
Install the Python SDK
Install the Python SDK using pip:
Terminal window pip install aptos-sdk -
Create a project directory
Create a new directory for your project:
Terminal window mkdir my-first-transactioncd my-first-transaction -
Create a new file
Create a new file named
transaction.py:Terminal window touch transaction.pyTerminal window type nul > transaction.py
2. Creating Test Accounts
Section titled “2. Creating Test Accounts”In blockchain, all transactions must come from an account. Let’s create two test accounts: one to send coins (Alice) and one to receive them (Bob).
-
Set up the client
First, we need to initialize the Aptos client that will connect to the blockchain. Open
transaction.tsin your editor and add:import {Account,Aptos,AptosConfig,Network,} from "@aptos-labs/ts-sdk";async function main() {// Initialize the Aptos clientconst config = new AptosConfig({ network: Network.DEVNET });const aptos = new Aptos(config);console.log("Connected to Aptos devnet");// More code will go here}main().catch(console.error); -
Generate accounts
Add this code inside your
main()function to create two accounts - Alice (sender) and Bob (receiver):// Generate two accountsconst alice = Account.generate();const bob = Account.generate();console.log("=== Addresses ===");console.log(`Alice's address: ${alice.accountAddress}`);console.log(`Bob's address: ${bob.accountAddress}`); -
Fund the accounts
Add this code after generating the accounts to get test coins from the faucet:
// Fund the accounts with test APT from the devnet faucetconsole.log("\n=== Funding accounts ===");await aptos.fundAccount({accountAddress: alice.accountAddress,amount: 100_000_000, // 1 APT = 100,000,000 octas});console.log("Accounts funded successfully");// Check initial balancesconst aliceBalance = await aptos.getAccountAPTAmount({accountAddress: alice.accountAddress,});const bobBalance = await aptos.getAccountAPTAmount({accountAddress: bob.accountAddress,});console.log("\n=== Initial Balances ===");console.log(`Alice: ${aliceBalance} octas`);console.log(`Bob: ${bobBalance} octas`); -
Run the code
Let’s test our code so far:
Terminal window npx ts-node transaction.tsYou should see output similar to:
Connected to Aptos devnet=== Addresses ===Alice's address: 0x978c213990c4833df71548df7ce49d54c759d6b6d932de22b24d56060b7af2aaBob's address: 0x7af2d6c93a2feafc9b69b5e8ad9d6b513b260f62f23f3a384a3a2e4a84694a9b=== Funding accounts ===Accounts funded successfully=== Initial Balances ===Alice: 100000000 octasBob: 0 octas
In blockchain, all transactions must come from an account. Let’s create two test accounts: one to send coins (Alice) and one to receive them (Bob).
-
Set up the client
First, we need to initialize the Aptos client that will connect to the blockchain. Open
transaction.pyin your editor and add:import asynciofrom aptos_sdk.account import Accountfrom aptos_sdk.async_client import FaucetClient, RestClientfrom aptos_sdk.transactions import EntryFunction, TransactionPayload, TransactionArgument, RawTransactionfrom aptos_sdk.bcs import Serializerimport time# Network configurationNODE_URL = "https://fullnode.devnet.aptoslabs.com/v1"FAUCET_URL = "https://faucet.devnet.aptoslabs.com"async def main():# Initialize the clientsrest_client = RestClient(NODE_URL)faucet_client = FaucetClient(FAUCET_URL, rest_client)print("Connected to Aptos devnet")# More code will go hereif __name__ == "__main__":asyncio.run(main()) -
Generate accounts
Add this code inside your
main()function to create two accounts - Alice (sender) and Bob (receiver):# Generate two accountsalice = Account.generate()bob = Account.generate()print("=== Addresses ===")print(f"Alice's address: {alice.address()}")print(f"Bob's address: {bob.address()}") -
Fund the accounts
Add this code after generating the accounts to get test coins from the faucet:
# Fund the accounts with test APT from the devnet faucetprint("\n=== Funding accounts ===")alice_amount = 100_000_000 # 1 APT = 100,000,000 octasbob_amount = 0 # Bob starts with 0 APTawait faucet_client.fund_account(alice.address(), alice_amount)print("Account funded successfully")# Check initial balancesalice_balance = await rest_client.account_balance(alice.address())bob_balance = await rest_client.account_balance(bob.address())print("\n=== Initial Balances ===")print(f"Alice: {alice_balance} octas")print(f"Bob: {bob_balance} octas") -
Run the code
Let’s test our code so far:
Terminal window python transaction.pyYou should see output similar to:
Connected to Aptos devnet=== Addresses ===Alice's address: 0x978c213990c4833df71548df7ce49d54c759d6b6d932de22b24d56060b7af2aaBob's address: 0x7af2d6c93a2feafc9b69b5e8ad9d6b513b260f62f23f3a384a3a2e4a84694a9b=== Funding accounts ===Accounts funded successfully=== Initial Balances ===Alice: 100000000 octasBob: 0 octas
3. Building a Transaction
Section titled “3. Building a Transaction”Now that we have funded accounts, let’s create a transaction to transfer coins from Alice to Bob. This is like filling out a form specifying what you want to send and to whom.
-
Understand transaction structure
A transaction in Aptos has several key components:
- Sender: The account initiating the transaction (Alice)
- Function: The on-chain function to call (in this case, a coin transfer)
- Arguments: Data needed by the function (recipient address and amount)
- Gas parameters: Maximum gas amount and gas unit price
- Expiration time: When the transaction is no longer valid if not executed
- Sequence number: A counter that prevents replay attacks
-
Build the transaction
Let’s add code to build a transaction that transfers 1000 octas from Alice to Bob:
Add this code to your
main()function:// 1. Build the transactionconsole.log("\n=== 1. Building the transaction ===");const transaction = await aptos.transaction.build.simple({sender: alice.accountAddress,data: {function: "0x1::aptos_account::transfer",functionArguments: [bob.accountAddress, 1000], // Transfer 1000 octas},});console.log("Transaction built successfully");// Access transaction details from the raw transactionconst rawTxn = transaction.rawTransaction;console.log(`Sender: ${rawTxn.sender}`);console.log(`Sequence Number: ${rawTxn.sequence_number}`);console.log(`Max Gas Amount: ${rawTxn.max_gas_amount}`);console.log(`Gas Unit Price: ${rawTxn.gas_unit_price}`);console.log(`Expiration Timestamp: ${new Date(Number(rawTxn.expiration_timestamp_secs) * 1000).toISOString()}`);
Now that we have funded accounts, let’s create a transaction to transfer coins from Alice to Bob. This is like filling out a form specifying what you want to send and to whom.
-
Understand transaction structure
A transaction in Aptos has several key components:
- Sender: The account initiating the transaction (Alice)
- Function: The on-chain function to call (in this case, a coin transfer)
- Arguments: Data needed by the function (recipient address and amount)
- Gas parameters: Maximum gas amount and gas unit price
- Expiration time: When the transaction is no longer valid if not executed
- Sequence number: A counter that prevents replay attacks
-
Build the transaction
Add the following code to your
main()function to build a transaction that transfers 1000 octas from Alice to Bob:# 1. Build the transactionprint("\n=== 1. Building the transaction ===")# Create the entry function payload# This specifies which function to call and with what argumentsentry_function = EntryFunction.natural("0x1::aptos_account", # Module address and name"transfer", # Function name[], # Type arguments (empty for this function)[# Function arguments with their serialization typeTransactionArgument(bob.address(), Serializer.struct), # Recipient addressTransactionArgument(1000, Serializer.u64), # Amount to transfer (1000 octas)],)# Get the chain ID for the transactionchain_id = await rest_client.chain_id()# Get the sender's current sequence numberaccount_data = await rest_client.account(alice.address())sequence_number = int(account_data["sequence_number"])# Create the raw transaction with all required fieldsraw_transaction = RawTransaction(sender=alice.address(), # Sender's addresssequence_number=sequence_number, # Sequence number to prevent replay attackspayload=TransactionPayload(entry_function), # The function to callmax_gas_amount=2000, # Maximum gas units to usegas_unit_price=100, # Price per gas unit in octasexpiration_timestamps_secs=int(time.time()) + 600, # Expires in 10 minuteschain_id=chain_id, # Chain ID to ensure correct network)print("Transaction built successfully")print(f"Sender: {raw_transaction.sender}")print(f"Sequence Number: {raw_transaction.sequence_number}")print(f"Max Gas Amount: {raw_transaction.max_gas_amount}")print(f"Gas Unit Price: {raw_transaction.gas_unit_price}")print(f"Expiration Timestamp: {time.ctime(raw_transaction.expiration_timestamps_secs)}")
4. Simulating the Transaction
Section titled “4. Simulating the Transaction”Before submitting a transaction, it’s wise to simulate it first to estimate the gas cost. This is like checking shipping costs before sending a package.
-
Simulate the transaction
Add this code after building the transaction:
// 2. Simulate the transactionconsole.log("\n=== 2. Simulating the transaction ===");const [simulationResult] = await aptos.transaction.simulate.simple({signerPublicKey: alice.publicKey,transaction,});const gasUsed = parseInt(simulationResult.gas_used);const gasUnitPrice = parseInt(simulationResult.gas_unit_price);console.log(`Estimated gas units: ${gasUsed}`);console.log(`Estimated gas cost: ${gasUsed * gasUnitPrice} octas`);console.log(`Transaction would ${simulationResult.success ? "succeed" : "fail"}`);
Before submitting a transaction, it’s wise to simulate it first to estimate the gas cost. This is like checking shipping costs before sending a package.
-
Simulate the transaction
Add this code after building the transaction:
# 2. Simulate the transactionprint("\n=== 2. Simulating the transaction ===")# Create a BCS transaction for simulation# This doesn't actually submit the transaction to the blockchainsimulation_transaction = await rest_client.create_bcs_transaction(alice, TransactionPayload(entry_function))# Simulate the transaction to estimate gas costs and check for errorssimulation_result = await rest_client.simulate_transaction(simulation_transaction, alice)# Extract and display the simulation resultsgas_used = int(simulation_result[0]['gas_used'])gas_unit_price = int(simulation_result[0]['gas_unit_price'])success = simulation_result[0]['success']print(f"Estimated gas units: {gas_used}")print(f"Estimated gas cost: {gas_used * gas_unit_price} octas")print(f"Transaction would {'succeed' if success else 'fail'}")
5. Signing and Submitting the Transaction
Section titled “5. Signing and Submitting the Transaction”Now that we’ve built and simulated the transaction, we need to sign it with Alice’s private key and submit it to the blockchain.
-
Sign the transaction
Signing proves that Alice authorized this transaction:
Add this code after simulating the transaction:
// 3. Sign the transactionconsole.log("\n=== 3. Signing the transaction ===");const senderAuthenticator = aptos.transaction.sign({signer: alice,transaction,});console.log("Transaction signed successfully"); -
Submit the transaction
Add this code after signing the transaction to submit the signed transaction to the blockchain:
// 4. Submit the transactionconsole.log("\n=== 4. Submitting the transaction ===");const pendingTransaction = await aptos.transaction.submit.simple({transaction,senderAuthenticator,});console.log(`Transaction submitted with hash: ${pendingTransaction.hash}`);
Now that we’ve built and simulated the transaction, we need to sign it with Alice’s private key and submit it to the blockchain.
-
Sign the transaction
Signing proves that Alice authorized this transaction:
Add this code after simulating the transaction:
# 3. Sign the transactionprint("\n=== 3. Signing the transaction ===")# Sign the raw transaction with the sender's private key# This creates a cryptographic signature that proves the sender authorized this transactionsigned_transaction = await rest_client.create_bcs_signed_transaction(alice, # Account with the private keyTransactionPayload(entry_function), # The payload from our transactionsequence_number=sequence_number # Use the same sequence number as before)print("Transaction signed successfully")# We can't easily extract the signature from the signed transaction object,# but we can confirm it was created -
Submit the transaction
Add this code after signing the transaction to submit the signed transaction to the blockchain:
# 4. Submit the transactionprint("\n=== 4. Submitting the transaction ===")# Submit the signed transaction to the blockchain# This broadcasts the transaction to the network for processingtx_hash = await rest_client.submit_bcs_transaction(signed_transaction)print(f"Transaction submitted with hash: {tx_hash}")
6. Waiting for Confirmation
Section titled “6. Waiting for Confirmation”After submitting a transaction, we need to wait for it to be processed by the blockchain. This is like waiting for a package to be delivered.
-
Wait for transaction completion
Add this code after submitting the transaction:
// 5. Wait for the transaction to completeconsole.log("\n=== 5. Waiting for transaction completion ===");const txnResult = await aptos.waitForTransaction({transactionHash: pendingTransaction.hash,});console.log(`Transaction completed with status: ${txnResult.success ? "SUCCESS" : "FAILURE"}`);// If you want to see more details about the transaction:console.log(`VM Status: ${txnResult.vm_status}`);console.log(`Gas used: ${txnResult.gas_used}`); -
Verify the results
Add this code after waiting for the transaction to check the balances and confirm the transfer worked:
// Check final balancesconst aliceFinalBalance = await aptos.getAccountAPTAmount({accountAddress: alice.accountAddress,});const bobFinalBalance = await aptos.getAccountAPTAmount({accountAddress: bob.accountAddress,});console.log("\n=== Final Balances ===");console.log(`Alice: ${aliceFinalBalance} octas (spent ${aliceBalance - aliceFinalBalance} octas on transfer and gas)`);console.log(`Bob: ${bobFinalBalance} octas (received 1000 octas)`); -
Run the complete code
Terminal window npx ts-node transaction.tsYou should see output similar to:
Connected to Aptos devnet=== Addresses ===Alice's address: 0x978c213990c4833df71548df7ce49d54c759d6b6d932de22b24d56060b7af2aaBob's address: 0x7af2d6c93a2feafc9b69b5e8ad9d6b513b260f62f23f3a384a3a2e4a84694a9b=== Funding accounts ===Accounts funded successfully=== Initial Balances ===Alice: 100000000 octasBob: 0 octas=== 1. Building the transaction ===Transaction built successfullySender: 0x978c213990c4833df71548df7ce49d54c759d6b6d932de22b24d56060b7af2aaSequence Number: 0Max Gas Amount: 20000Gas Unit Price: 100Expiration Timestamp: 2025-03-05T22:59:21.000Z=== 2. Simulating the transaction ===Estimated gas units: 146Estimated gas cost: 14600 octasTransaction would succeed=== 3. Signing the transaction ===Transaction signed successfully=== 4. Submitting the transaction ===Transaction submitted with hash: 0x3a8a3e34a1c64ad9d7636a3a827b7ec3bb12d73825b36fa06d425c5a3b42cccc=== 5. Waiting for transaction completion ===Transaction completed with status: SUCCESSVM Status: Executed successfullyGas used: 146=== Final Balances ===Alice: 99984400 octas (spent 15600 octas on transfer and gas)Bob: 1000 octas (received 1000 octas)
After submitting a transaction, we need to wait for it to be processed by the blockchain. This is like waiting for a package to be delivered.
-
Wait for transaction completion
Add this code after submitting the transaction:
# 5. Wait for the transaction to completeprint("\n=== 5. Waiting for transaction completion ===")# Wait for the transaction to be processed by the blockchain# This polls the blockchain until the transaction is confirmedawait rest_client.wait_for_transaction(tx_hash)# Get the transaction details to check its statustransaction_details = await rest_client.transaction_by_hash(tx_hash)success = transaction_details["success"]vm_status = transaction_details["vm_status"]gas_used = transaction_details["gas_used"]print(f"Transaction completed with status: {'SUCCESS' if success else 'FAILURE'}")print(f"VM Status: {vm_status}")print(f"Gas used: {gas_used}") -
Verify the results
Add this code after waiting for the transaction to check the balances and confirm the transfer worked:
# Check final balancesalice_final_balance = await rest_client.account_balance(alice.address())bob_final_balance = await rest_client.account_balance(bob.address())print("\n=== Final Balances ===")print(f"Alice: {alice_final_balance} octas (spent {alice_balance - alice_final_balance} octas on transfer and gas)")print(f"Bob: {bob_final_balance} octas (received 1000 octas)") -
Run the complete code
Terminal window python transaction.pyYou should see output similar to:
Connected to Aptos devnet=== Addresses ===Alice's address: 0x978c213990c4833df71548df7ce49d54c759d6b6d932de22b24d56060b7af2aaBob's address: 0x7af2d6c93a2feafc9b69b5e8ad9d6b513b260f62f23f3a384a3a2e4a84694a9b=== Funding accounts ===Accounts funded successfully=== Initial Balances ===Alice: 100000000 octasBob: 0 octas=== 1. Building the transaction ===Transaction built successfullySender: 0x978c213990c4833df71548df7ce49d54c759d6b6d932de22b24d56060b7af2aaSequence Number: 0Max Gas Amount: 2000Gas Unit Price: 100Expiration Timestamp: Wed Mar 05 22:59:21 2025=== 2. Simulating the transaction ===Estimated gas units: 146Estimated gas cost: 14600 octasTransaction would succeed=== 3. Signing the transaction ===Transaction signed successfully=== 4. Submitting the transaction ====== 3. Signing the transaction ===Transaction signed successfully=== 4. Submitting the transaction ===Transaction submitted with hash: 0x3a8a3e34a1c64ad9d7636a3a827b7ec3bb12d73825b36fa06d425c5a3b42cccc=== 5. Waiting for transaction completion ===Transaction completed with status: SUCCESSVM Status: Executed successfullyGas used: 146=== Final Balances ===Alice: 99984400 octas (spent 15600 octas on transfer and gas)Bob: 1000 octas (received 1000 octas)
7. (Optional) Explore Your Transaction On-Chain
Section titled “7. (Optional) Explore Your Transaction On-Chain”Now that you’ve successfully executed a transaction, you can explore it on the Aptos Explorer. This will help you understand how transactions are recorded on the blockchain and what information is publicly available.
-
Copy your transaction hash
From your terminal output, copy the transaction hash that was printed after submission. It looks something like this:
Transaction submitted with hash: 0x3a8a3e34a1c64ad9d7636a3a827b7ec3bb12d73825b36fa06d425c5a3b42cccc -
Open the Aptos Explorer
Go to the Aptos Explorer.
-
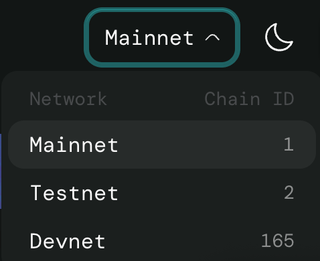
Ensure you are on Devnet network
Look for “Devnet” in the top right corner, or switch networks by clicking the dropdown and selecting Devnet.
-
Search for your transaction
Paste your transaction hash into the search bar in the middle of the page.
-
View the transaction details
Wait for the results to appear, then click on the transaction hash to view its details.
You should see information about your transaction, including:
- Status (should be “Success”)
- Timestamp
- Gas used
- Sender and recipient addresses
- Amount transferred
-
Explore further
From the transaction details page, you can:
- Click on the sender or recipient addresses to view their account details
- See the exact changes made to the blockchain state
- View the transaction payload and arguments
8. Next Steps
Section titled “8. Next Steps”Congratulations! You’ve successfully created and executed your first transaction on the Aptos blockchain. Here are some suggestions for what to explore next:
Learn about more complex transactions:
- Multi-Agent Signatures - Transactions requiring multiple signers
- Sponsoring Transactions - Having another account pay gas fees
- Batching Transactions - Sending multiple transactions efficiently
Explore smart contracts or account basics:
- Your First Move Module - Create your own smart contract
- Account Basics
Join the Aptos Discord and share what you’re building!
Full Code Sample
Section titled “Full Code Sample”The complete code samples below combine all the snippets we’ve covered in this tutorial:
import { Account, Aptos, AptosConfig, Network } from "@aptos-labs/ts-sdk";
async function main() {  // Initialize the Aptos client  const config = new AptosConfig({ network: Network.DEVNET });  const aptos = new Aptos(config);
  console.log("Connected to Aptos devnet");
  // More code will go here  // Generate two accounts  const alice = Account.generate();  const bob = Account.generate();
  console.log("=== Addresses ===");  console.log(`Alice's address: ${alice.accountAddress}`);  console.log(`Bob's address: ${bob.accountAddress}`);
  // Fund the accounts with test APT from the devnet faucet  console.log("\n=== Funding accounts ===");  await aptos.fundAccount({    accountAddress: alice.accountAddress,    amount: 100_000_000, // 1 APT = 100,000,000 octas  });  await aptos.fundAccount({    accountAddress: bob.accountAddress,    amount: 0, // Bob starts with 0 APT  });  console.log("Accounts funded successfully");
  // Check initial balances  const aliceBalance = await aptos.getAccountAPTAmount({    accountAddress: alice.accountAddress,  });  const bobBalance = await aptos.getAccountAPTAmount({    accountAddress: bob.accountAddress,  });
  console.log("\n=== Initial Balances ===");  console.log(`Alice: ${aliceBalance} octas`);  console.log(`Bob: ${bobBalance} octas`);
  // 1. Build the transaction  console.log("\n=== 1. Building the transaction ===");  const transaction = await aptos.transaction.build.simple({    sender: alice.accountAddress,    data: {      function: "0x1::aptos_account::transfer",      functionArguments: [bob.accountAddress, 1000], // Transfer 1000 octas    },  });  console.log("Transaction built successfully");  // Use type assertion to bypass TypeScript's type checking  const txnAny = transaction as any;  console.log(`Sender: ${alice.accountAddress}`); // Use the known sender address  console.log(`Sequence Number: ${txnAny.sequenceNumber || "N/A"}`);  console.log(`Max Gas Amount: ${txnAny.maxGasAmount || "N/A"}`);  console.log(`Gas Unit Price: ${txnAny.gasUnitPrice || "N/A"}`);  console.log(    `Expiration Timestamp: ${new Date(      Number(txnAny.expirationTimestampSecs || 0) * 1000    ).toISOString()}`  );
  // 2. Simulate the transaction  console.log("\n=== 2. Simulating the transaction ===");  const [simulationResult] = await aptos.transaction.simulate.simple({    signerPublicKey: alice.publicKey,    transaction,  });
  console.log(`Estimated gas units: ${simulationResult.gas_used}`);  console.log(    `Estimated gas cost: ${      Number(simulationResult.gas_used) * Number(simulationResult.gas_unit_price)    } octas`  );  console.log(    `Transaction would ${simulationResult.success ? "succeed" : "fail"}`  );
  // 3. Sign the transaction  console.log("\n=== 3. Signing the transaction ===");  const senderAuthenticator = aptos.transaction.sign({    signer: alice,    transaction,  });  console.log("Transaction signed successfully");  // Use type assertion to bypass TypeScript's type checking  const authAny = senderAuthenticator as any;  const signatureStr = typeof authAny.signature === 'string'    ? authAny.signature    : JSON.stringify(authAny.signature || '');  console.log(`Signature: ${signatureStr.slice(0, 20)}...`);
  // 4. Submit the transaction  console.log("\n=== 4. Submitting the transaction ===");  const pendingTransaction = await aptos.transaction.submit.simple({    transaction,    senderAuthenticator,  });  console.log(`Transaction submitted with hash: ${pendingTransaction.hash}`);
  // 5. Wait for the transaction to complete  console.log("\n=== 5. Waiting for transaction completion ===");  const txnResult = await aptos.waitForTransaction({    transactionHash: pendingTransaction.hash,  });  console.log(    `Transaction completed with status: ${      txnResult.success ? "SUCCESS" : "FAILURE"    }`  );
  // If you want to see more details about the transaction:  console.log(`VM Status: ${txnResult.vm_status}`);  console.log(`Gas used: ${txnResult.gas_used}`);
  // Check final balances  const aliceFinalBalance = await aptos.getAccountAPTAmount({    accountAddress: alice.accountAddress,  });  const bobFinalBalance = await aptos.getAccountAPTAmount({    accountAddress: bob.accountAddress,  });
  console.log("\n=== Final Balances ===");  console.log(    `Alice: ${aliceFinalBalance} octas (spent ${      aliceBalance - aliceFinalBalance    } octas on transfer and gas)`  );  console.log(`Bob: ${bobFinalBalance} octas (received 1000 octas)`);}
main().catch(console.error);
import asynciofrom aptos_sdk.account import Accountfrom aptos_sdk.async_client import FaucetClient, RestClientfrom aptos_sdk.transactions import EntryFunction, TransactionPayload, TransactionArgument, RawTransactionfrom aptos_sdk.bcs import Serializerimport time
# Network configurationNODE_URL = "https://fullnode.devnet.aptoslabs.com/v1"FAUCET_URL = "https://faucet.devnet.aptoslabs.com"
async def main(): # Initialize the clients rest_client = RestClient(NODE_URL) faucet_client = FaucetClient(FAUCET_URL, rest_client)
print("Connected to Aptos devnet")
# Generate two accounts alice = Account.generate() bob = Account.generate()
print("=== Addresses ===") print(f"Alice's address: {alice.address()}") print(f"Bob's address: {bob.address()}") # More code will go here # Fund the accounts with test APT from the devnet faucet print("\n=== Funding accounts ===") alice_amount = 100_000_000 # 1 APT = 100,000,000 octas bob_amount = 0 # Bob starts with 0 APT
await faucet_client.fund_account(alice.address(), alice_amount) await faucet_client.fund_account(bob.address(), bob_amount) print("Accounts funded successfully")
# Check initial balances alice_balance = await rest_client.account_balance(alice.address()) bob_balance = await rest_client.account_balance(bob.address())
print("\n=== Initial Balances ===") print(f"Alice: {alice_balance} octas") print(f"Bob: {bob_balance} octas")
# 1. Build the transaction print("\n=== 1. Building the transaction ===")
# Create the entry function payload # This specifies which function to call and with what arguments entry_function = EntryFunction.natural( "0x1::aptos_account", # Module address and name "transfer", # Function name [], # Type arguments (empty for this function) [ # Function arguments with their serialization type TransactionArgument(bob.address(), Serializer.struct), # Recipient address TransactionArgument(1000, Serializer.u64), # Amount to transfer (1000 octas) ], )
# Get the chain ID for the transaction chain_id = await rest_client.chain_id()
# Get the sender's current sequence number account_data = await rest_client.account(alice.address()) sequence_number = int(account_data["sequence_number"])
# Create the raw transaction with all required fields raw_transaction = RawTransaction( sender=alice.address(), # Sender's address sequence_number=sequence_number, # Sequence number to prevent replay attacks payload=TransactionPayload(entry_function), # The function to call max_gas_amount=2000, # Maximum gas units to use gas_unit_price=100, # Price per gas unit in octas expiration_timestamps_secs=int(time.time()) + 600, # Expires in 10 minutes chain_id=chain_id, # Chain ID to ensure correct network )
print("Transaction built successfully") print(f"Sender: {raw_transaction.sender}") print(f"Sequence Number: {raw_transaction.sequence_number}") print(f"Max Gas Amount: {raw_transaction.max_gas_amount}") print(f"Gas Unit Price: {raw_transaction.gas_unit_price}") print(f"Expiration Timestamp: {time.ctime(raw_transaction.expiration_timestamps_secs)}")
# 2. Simulate the transaction print("\n=== 2. Simulating the transaction ===")
# Create a BCS transaction for simulation # This doesn't actually submit the transaction to the blockchain simulation_transaction = await rest_client.create_bcs_transaction(alice, TransactionPayload(entry_function))
# Simulate the transaction to estimate gas costs and check for errors simulation_result = await rest_client.simulate_transaction(simulation_transaction, alice)
# Extract and display the simulation results gas_used = int(simulation_result[0]['gas_used']) gas_unit_price = int(simulation_result[0]['gas_unit_price']) success = simulation_result[0]['success']
print(f"Estimated gas units: {gas_used}") print(f"Estimated gas cost: {gas_used * gas_unit_price} octas") print(f"Transaction would {'succeed' if success else 'fail'}")
# 3. Sign the transaction print("\n=== 3. Signing the transaction ===")
# Sign the raw transaction with the sender's private key # This creates a cryptographic signature that proves the sender authorized this transaction signed_transaction = await rest_client.create_bcs_signed_transaction( alice, # Account with the private key TransactionPayload(entry_function), # The payload from our transaction sequence_number=sequence_number # Use the same sequence number as before )
print("Transaction signed successfully") # We can't easily extract the signature from the signed transaction object, # but we can confirm it was created
# 4. Submit the transaction print("\n=== 4. Submitting the transaction ===")
# Submit the signed transaction to the blockchain # This broadcasts the transaction to the network for processing tx_hash = await rest_client.submit_bcs_transaction(signed_transaction)
print(f"Transaction submitted with hash: {tx_hash}")
# 5. Wait for the transaction to complete print("\n=== 5. Waiting for transaction completion ===")
# Wait for the transaction to be processed by the blockchain # This polls the blockchain until the transaction is confirmed await rest_client.wait_for_transaction(tx_hash)
# Get the transaction details to check its status transaction_details = await rest_client.transaction_by_hash(tx_hash) success = transaction_details["success"] vm_status = transaction_details["vm_status"] gas_used = transaction_details["gas_used"]
print(f"Transaction completed with status: {'SUCCESS' if success else 'FAILURE'}") print(f"VM Status: {vm_status}") print(f"Gas used: {gas_used}")
# Check final balances alice_final_balance = await rest_client.account_balance(alice.address()) bob_final_balance = await rest_client.account_balance(bob.address())
print("\n=== Final Balances ===") print(f"Alice: {alice_final_balance} octas (spent {alice_balance - alice_final_balance} octas on transfer and gas)") print(f"Bob: {bob_final_balance} octas (received 1000 octas)")if __name__ == "__main__": asyncio.run(main())