Configurando Aptos MCP con Cursor
- Abre el IDE de Cursor
- En la carpeta raíz del proyecto, crea una carpeta
.cursor - En la carpeta
.cursor, crea un archivomcp.json - Pega este contenido
{ "mcpServers": { "aptos-mcp": { "command": "npx", "args": ["-y", "@aptos-labs/aptos-mcp"], "env": { "APTOS_BOT_KEY": "<clave_api_bot>" } } }}-
Obtén tu
APTOS_BOT_KEY:- Visita Geomi e inicia sesión con tu cuenta.
- Navega a la sección de Claves API y genera una nueva clave.
- Copia la clave generada para usar en el siguiente paso.
-
Asegúrate de actualizar la
APTOS_BOT_KEYen el archivomcp.jsoncon la clave que acabas de generar.
Verificar que Cursor ejecute tu MCP
Sección titulada «Verificar que Cursor ejecute tu MCP»- Abre la Configuración de Cursor:
cursor -> settings -> cursor settings - Ve a la sección
MCPoTools & Integrations - Asegúrate de que esté habilitado y mostrando un indicador de color verde

-
Haz clic en el ícono “refresh” para actualizar el MCP.
-
Asegúrate de que el menú desplegable de la ventana de IA de Cursor esté configurado en
Agent

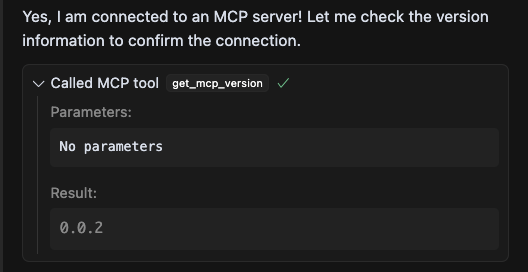
- Pregunta al agente con
¿qué versión de aptos mcp estás usando?para verificar la conexión. El agente debería responder con algo como:
