Integrate with Aptos Names Service
The Aptos Name Service provides a React UI package that offers developers a customizable button and modal to enable users to search for and mint Aptos names directly from their website.
Prerequisites
- React project
- Supporting dependencies installed in the root directory of your React project with npm or yarn:
npm install @emotion/styled @emotion/reactyarn add @emotion/styled @emotion/react react-copy-to-clipboard
Use Aptos Names Service Connector
-
Open a terminal session and navigate to the root directory of your React project.
-
Install the
aptos-names-connectorpackage using npm or yarn:npm install "@aptos-labs/aptos-names-connector"yarn add "@aptos-labs/aptos-names-connector"
-
Once you have installed the package, you can import the
AptosNamesConnectorcomponent and use it in your React application (by default in./src/App.js):import { AptosNamesConnector } from "@aptos-labs/aptos-names-connector";
function MyComponent() {
const handleSignTransaction = async () => {
// Handle signing of transaction
};
return (
<AptosNamesConnector
onSignTransaction={handleSignTransaction}
isWalletConnected={true}
network="mainnet"
buttonLabel="Claim"
/>
);
} -
To see your changes, start a development server using npm or yarn. The following commands will open the React application in your default web browser (typically to
localhost:3000):npm startyarn start
Configure AptosNamesConnector properties
The AptosNamesConnector component accepts the following props:
onSignTransaction: A required callback function that is called when the user clicks the "Mint" button in the modal. This function should handle the signing of the transaction.isWalletConnected: A boolean value that indicates whether the user's wallet is connected.network: A string value that specifies whether the component should connect to the mainnet or testnet.buttonLabel: A string value that specifies the text to display on the button.
Customize button label and appearance
The button label can be customized by passing a string value to the buttonLabel prop.
The appearance of the button in the AptosNamesConnector component can be customized to fit in your website. The button has the CSS class name of ans_connector_button:
.ans-connector-button {
  background-color: #000000;
  border: none;
  border-radius: 4px;
  color: #ffffff;
  cursor: pointer;
  font-size: 16px;
  font-weight: bold;
  padding: 12px 16px;
}
To use ans_connector_button in your React application, add import "@aptos-labs/aptos-names-connector/dist/index.css"; to the top of your App.js file and reference it with <button className="ans_connector_button"></button>
Supported networks
The AptosNamesConnector component supports both mainnet and testnet. To connect to the mainnet, set the network prop to "mainnet". To connect to the testnet, set the network prop to "testnet".
Example
The following example shows how to use the AptosNamesConnector component in a React application:
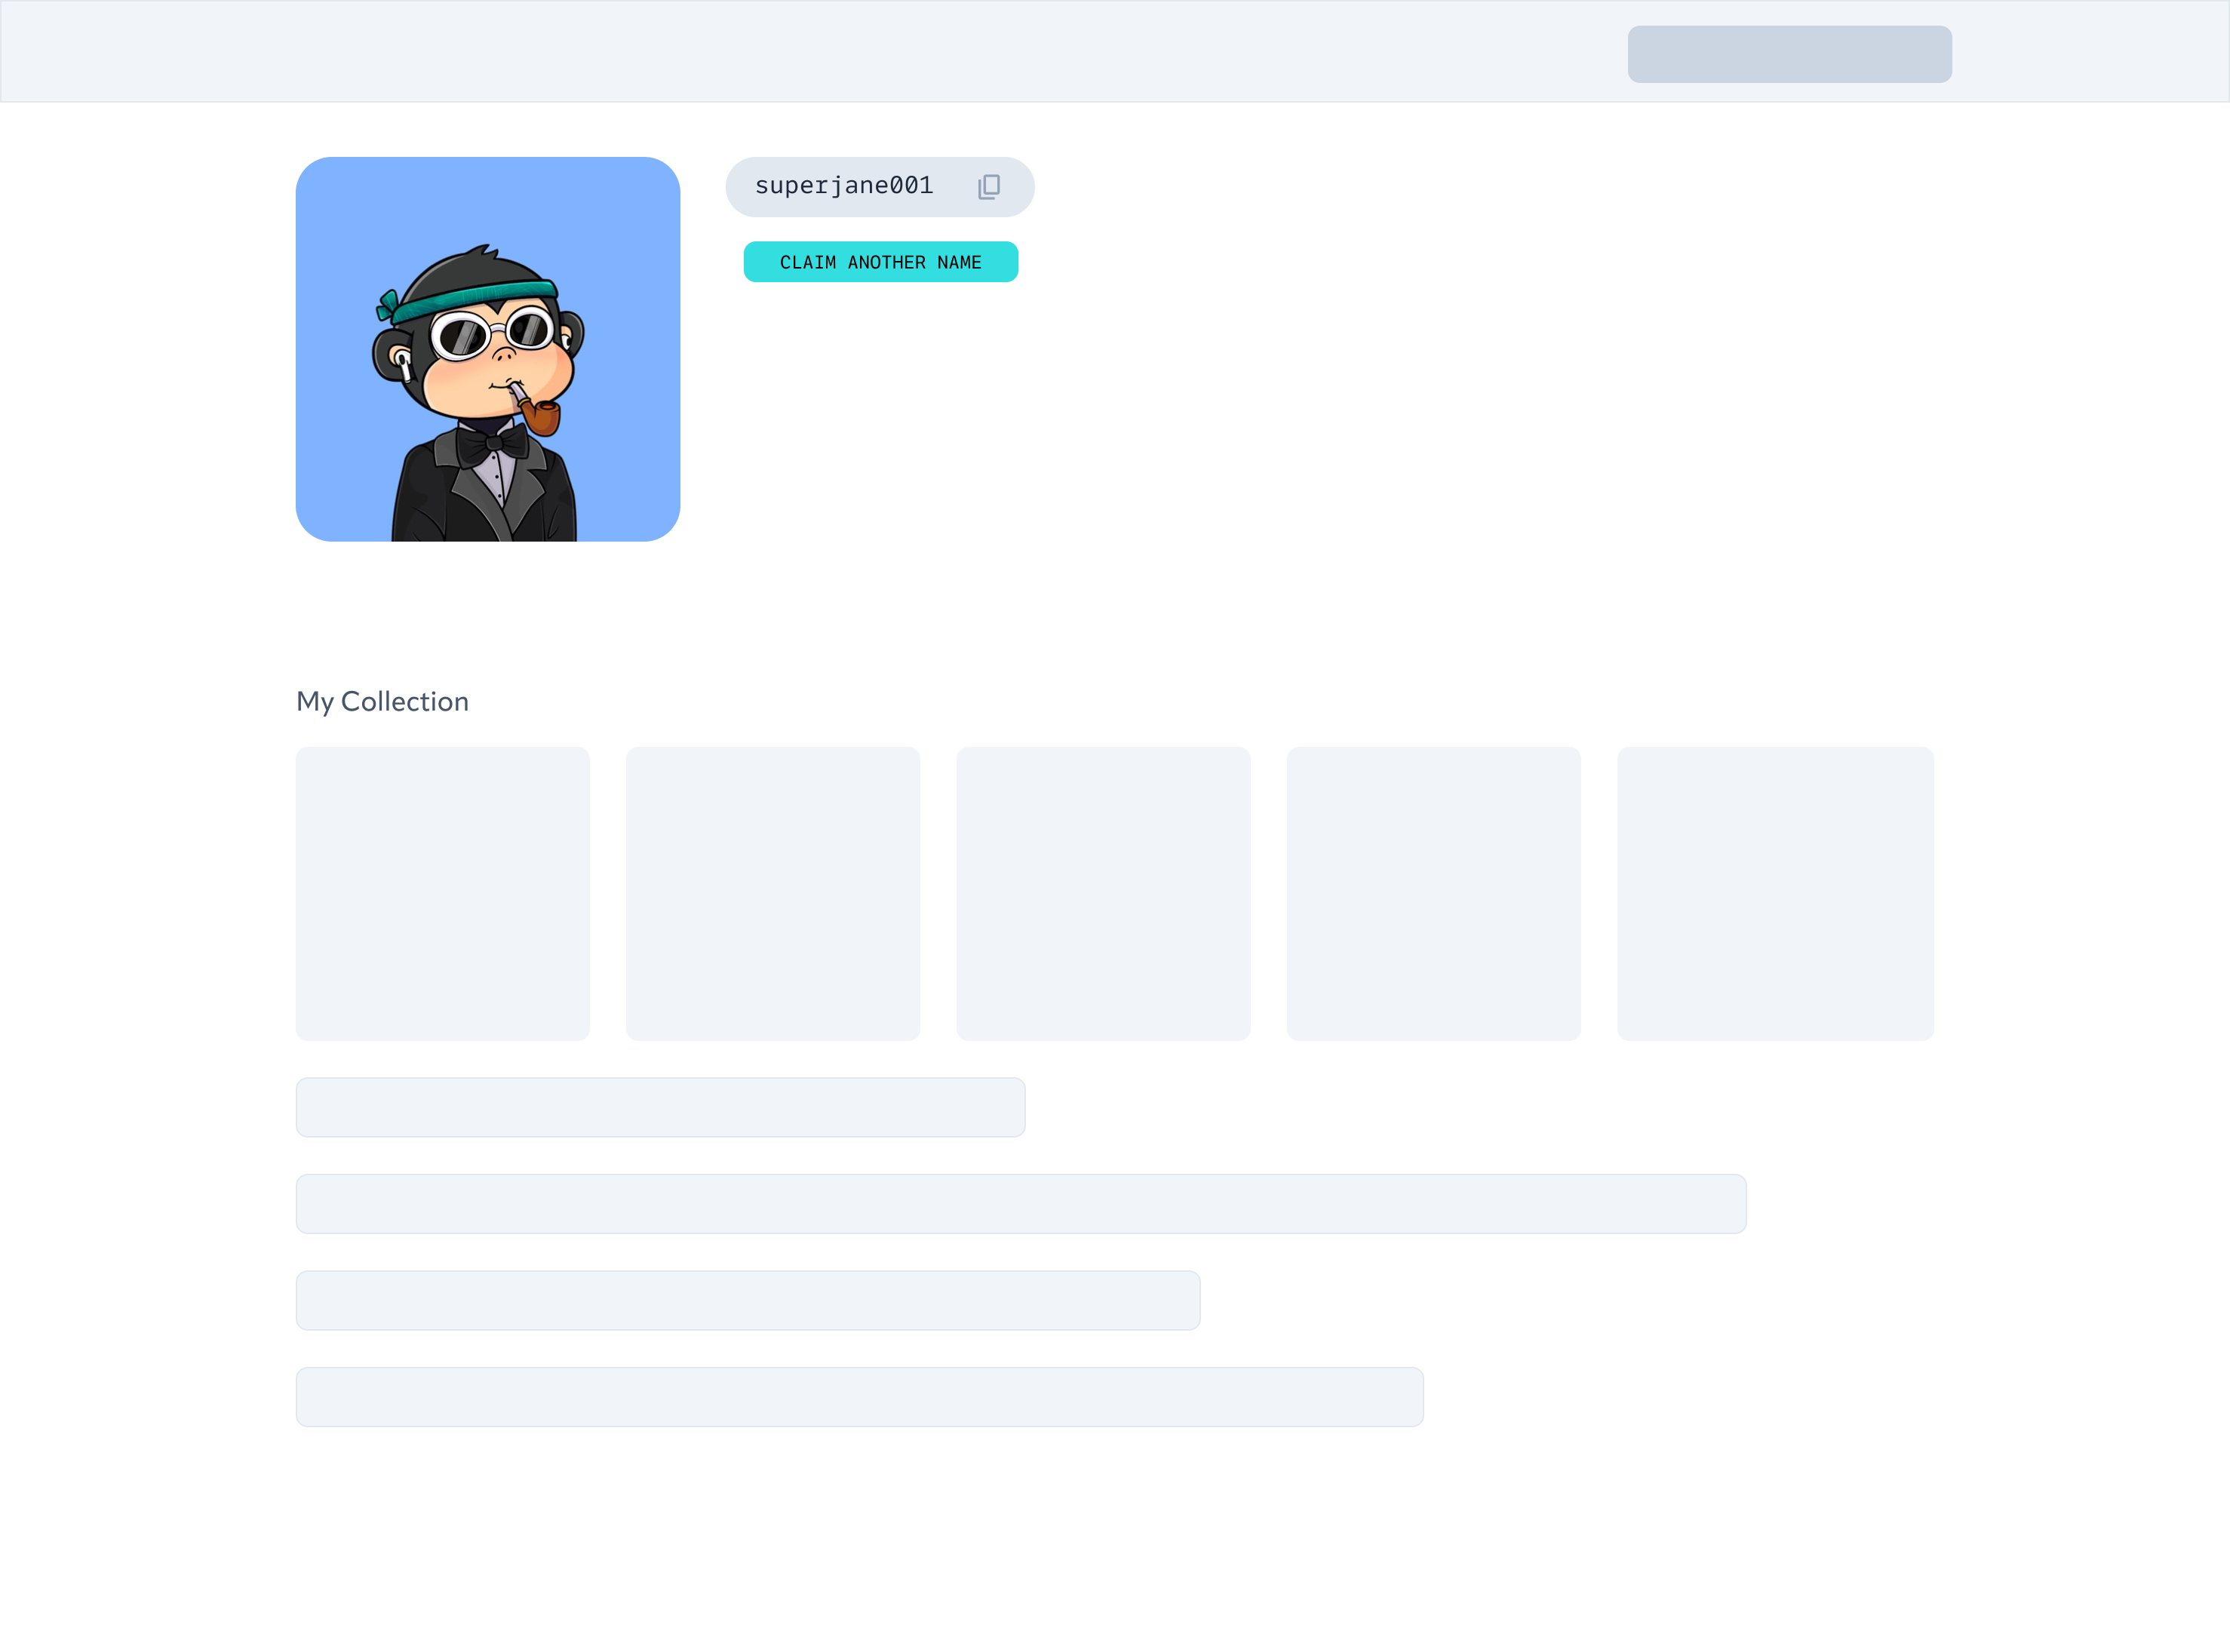
- Add a ‘claim name’ button to any page in your application. This allows your users to directly create an Aptos name, giving them a human-readable .apt name for their Aptos wallet address. You can customize the look of the button to suit your application. Here is an example on the profile page of an NFT marketplace.

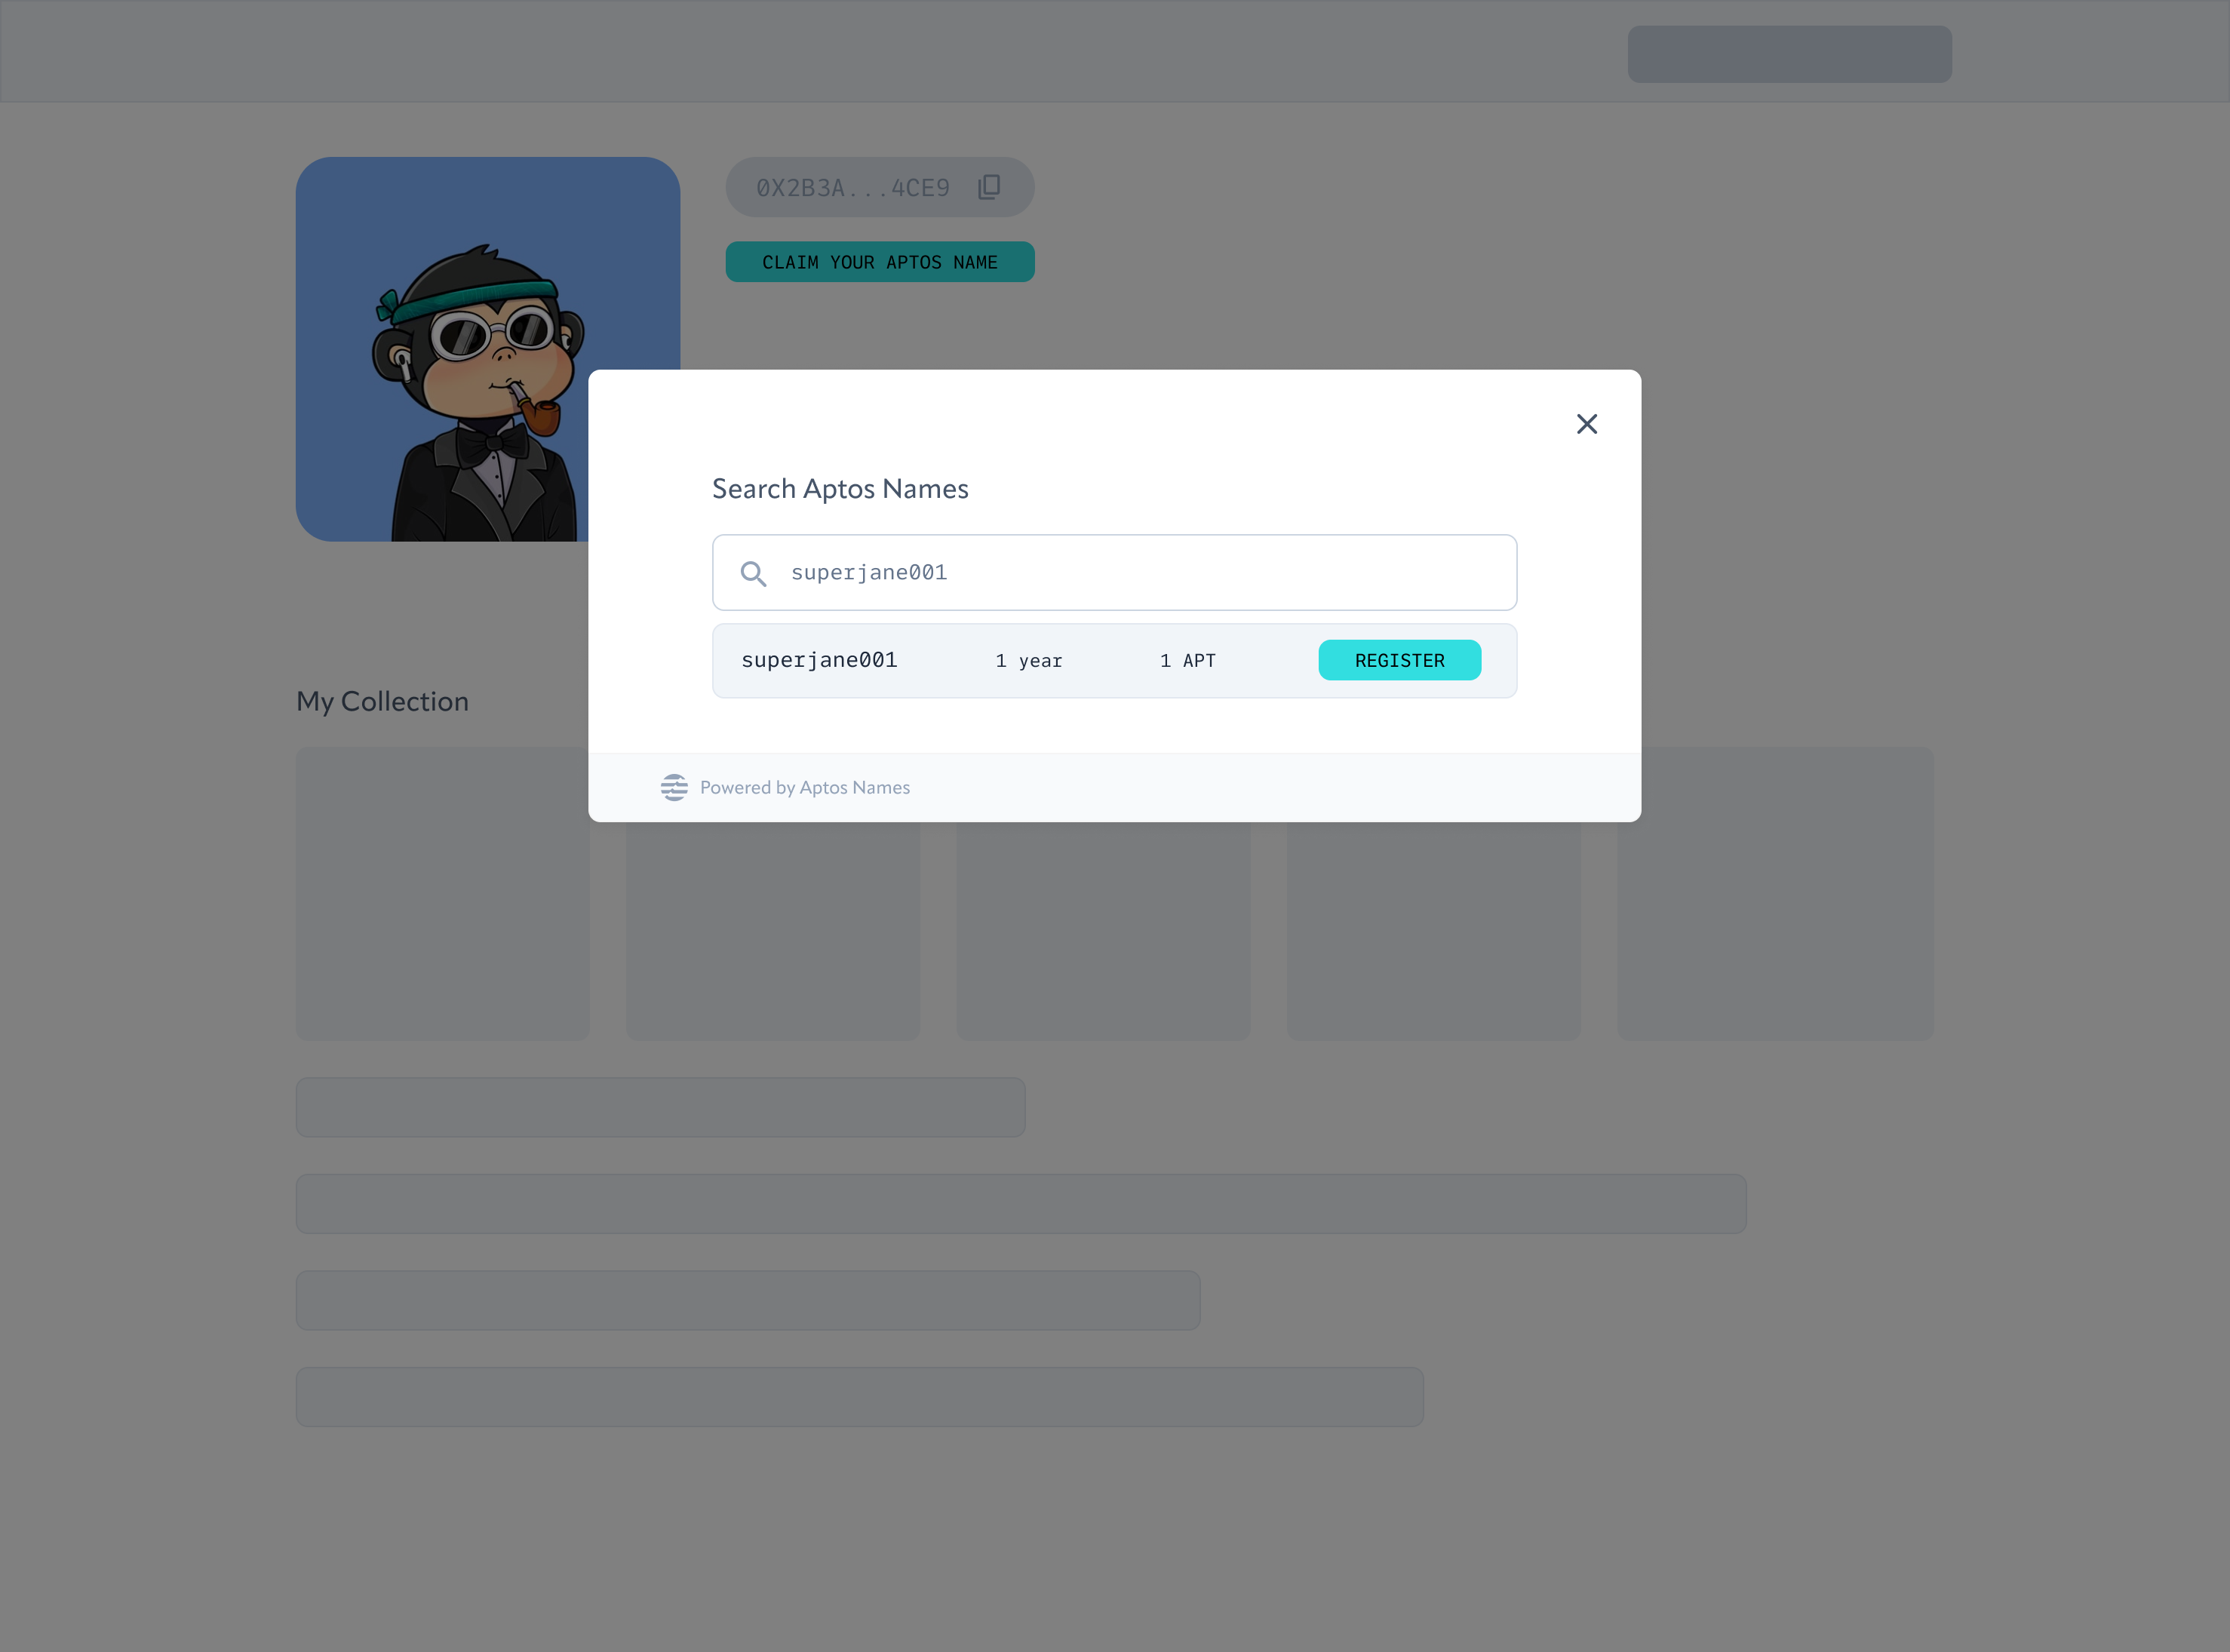
- When the button is clicked, the Aptos Names modal will show up, and the user can search for a name and mint it directly in your application.
- Once the user has minted their name, you can replace their Aptos wallet address by querying from Aptos fullnodes. Now your users have a human-readable .apt name.